Recommended cladding options (simple decision logic)
| Priority |
What to choose |
Why it’s a sensible default |
| Stability + low maintenance |
ThermoWood cladding boards |
Thermally modified timber is typically more dimensionally stable, helping reduce movement-related issues. |
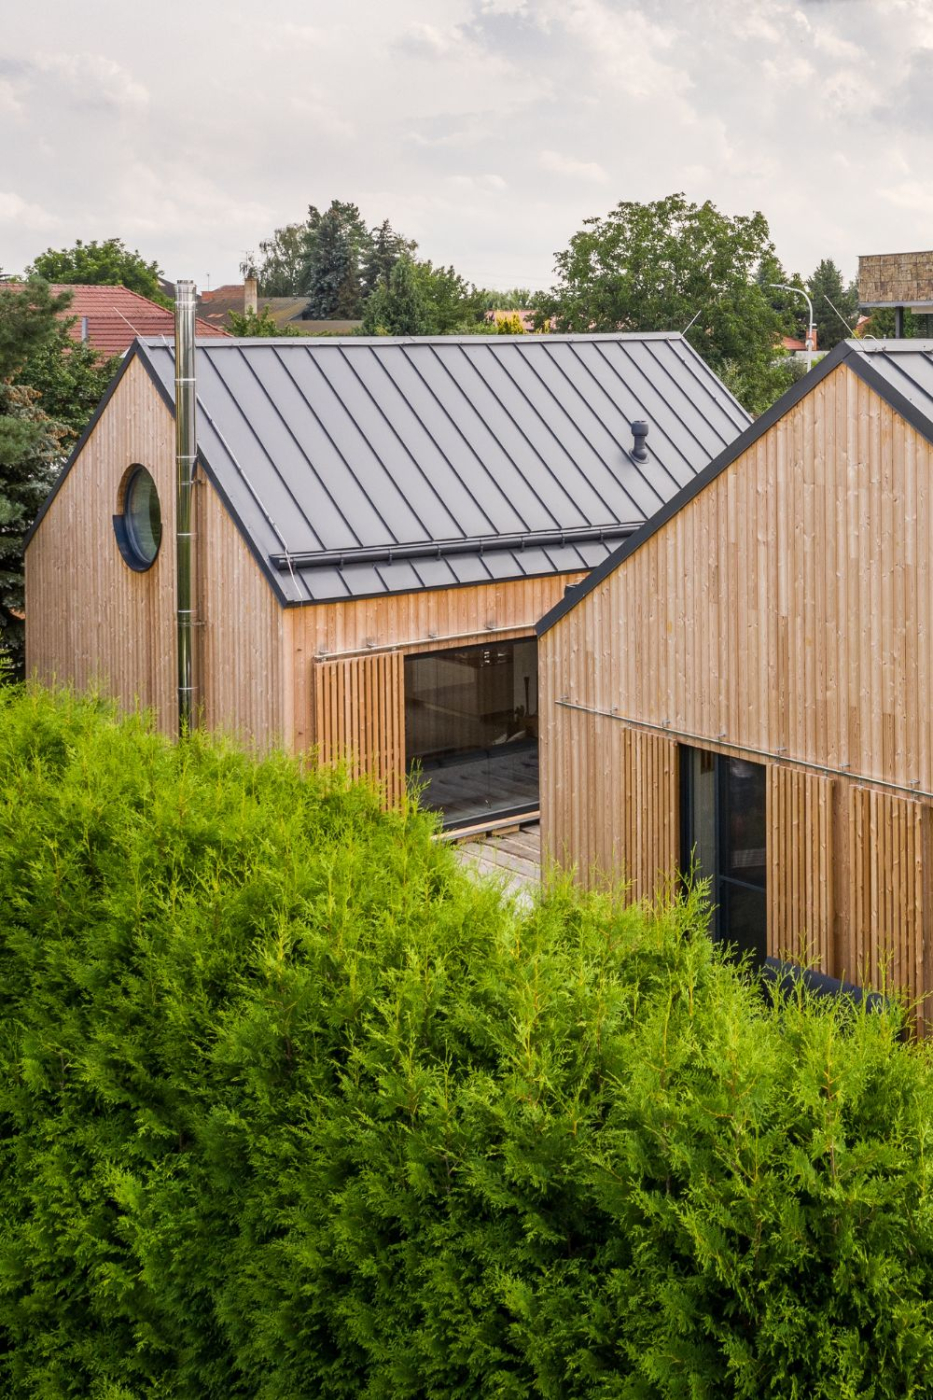
| Natural durability + strong value |
Siberian larch cladding boards |
Popular in UK projects for external use where you want performance without going fully “premium”. |
| Modern ventilated façade profiles |
rainscreen cladding boards |
Profiles designed around cavity performance and crisp detailing for contemporary elevations. |
Before you start: checks, tools, and materials
Pre-install checklist (do this before a single board goes up)
-
Confirm exposure: coastal/high wind zones need better corrosion resistance and more careful detailing.
-
Confirm wall build-up: membrane type and batten strategy depends on your substrate and insulation approach.
-
Decide orientation: vertical vs horizontal changes batten direction and water paths.
-
Set ground clearance: keep cladding clear of splashback zones (do not run boards into soil or paving).
-
Plan openings: window reveals, corners, and base detail should be decided early.
Tools (typical site kit)
- Laser level or long spirit level + straight edge
- Impact driver / drill, countersink where needed
- Mitre saw / track saw, fine blade for clean cuts
- Moisture meter (useful for checking boards and battens)
- Chalk line, tape measure, PPE
Materials (the “don’t forget” items)
- Breathable membrane (external wall grade)
- Battens (treated, straight, consistent thickness)
- Insect mesh / cavity closer at base and top ventilation points
- Corrosion-resistant fixings and compatible washers/spacers if needed
- End-grain sealer / detailing consumables where applicable
Step-by-step installation sequence (UK rainscreen method)
Step 1: Prepare the substrate and set your lines
Start with a flat, sound substrate. If the wall is out, you will “bake in” uneven shadow lines and wavy boards. Set a datum line (usually at base) and mark batten lines. Decide where ventilation will enter and exit the cavity, then make sure those paths won’t be blocked later by trims, sealant, or insulation returns.
Image suggestion: Elevation diagram showing datum line, batten centres and base clearance.
Alt text: “Datum line and batten layout for timber rainscreen cladding installation”.
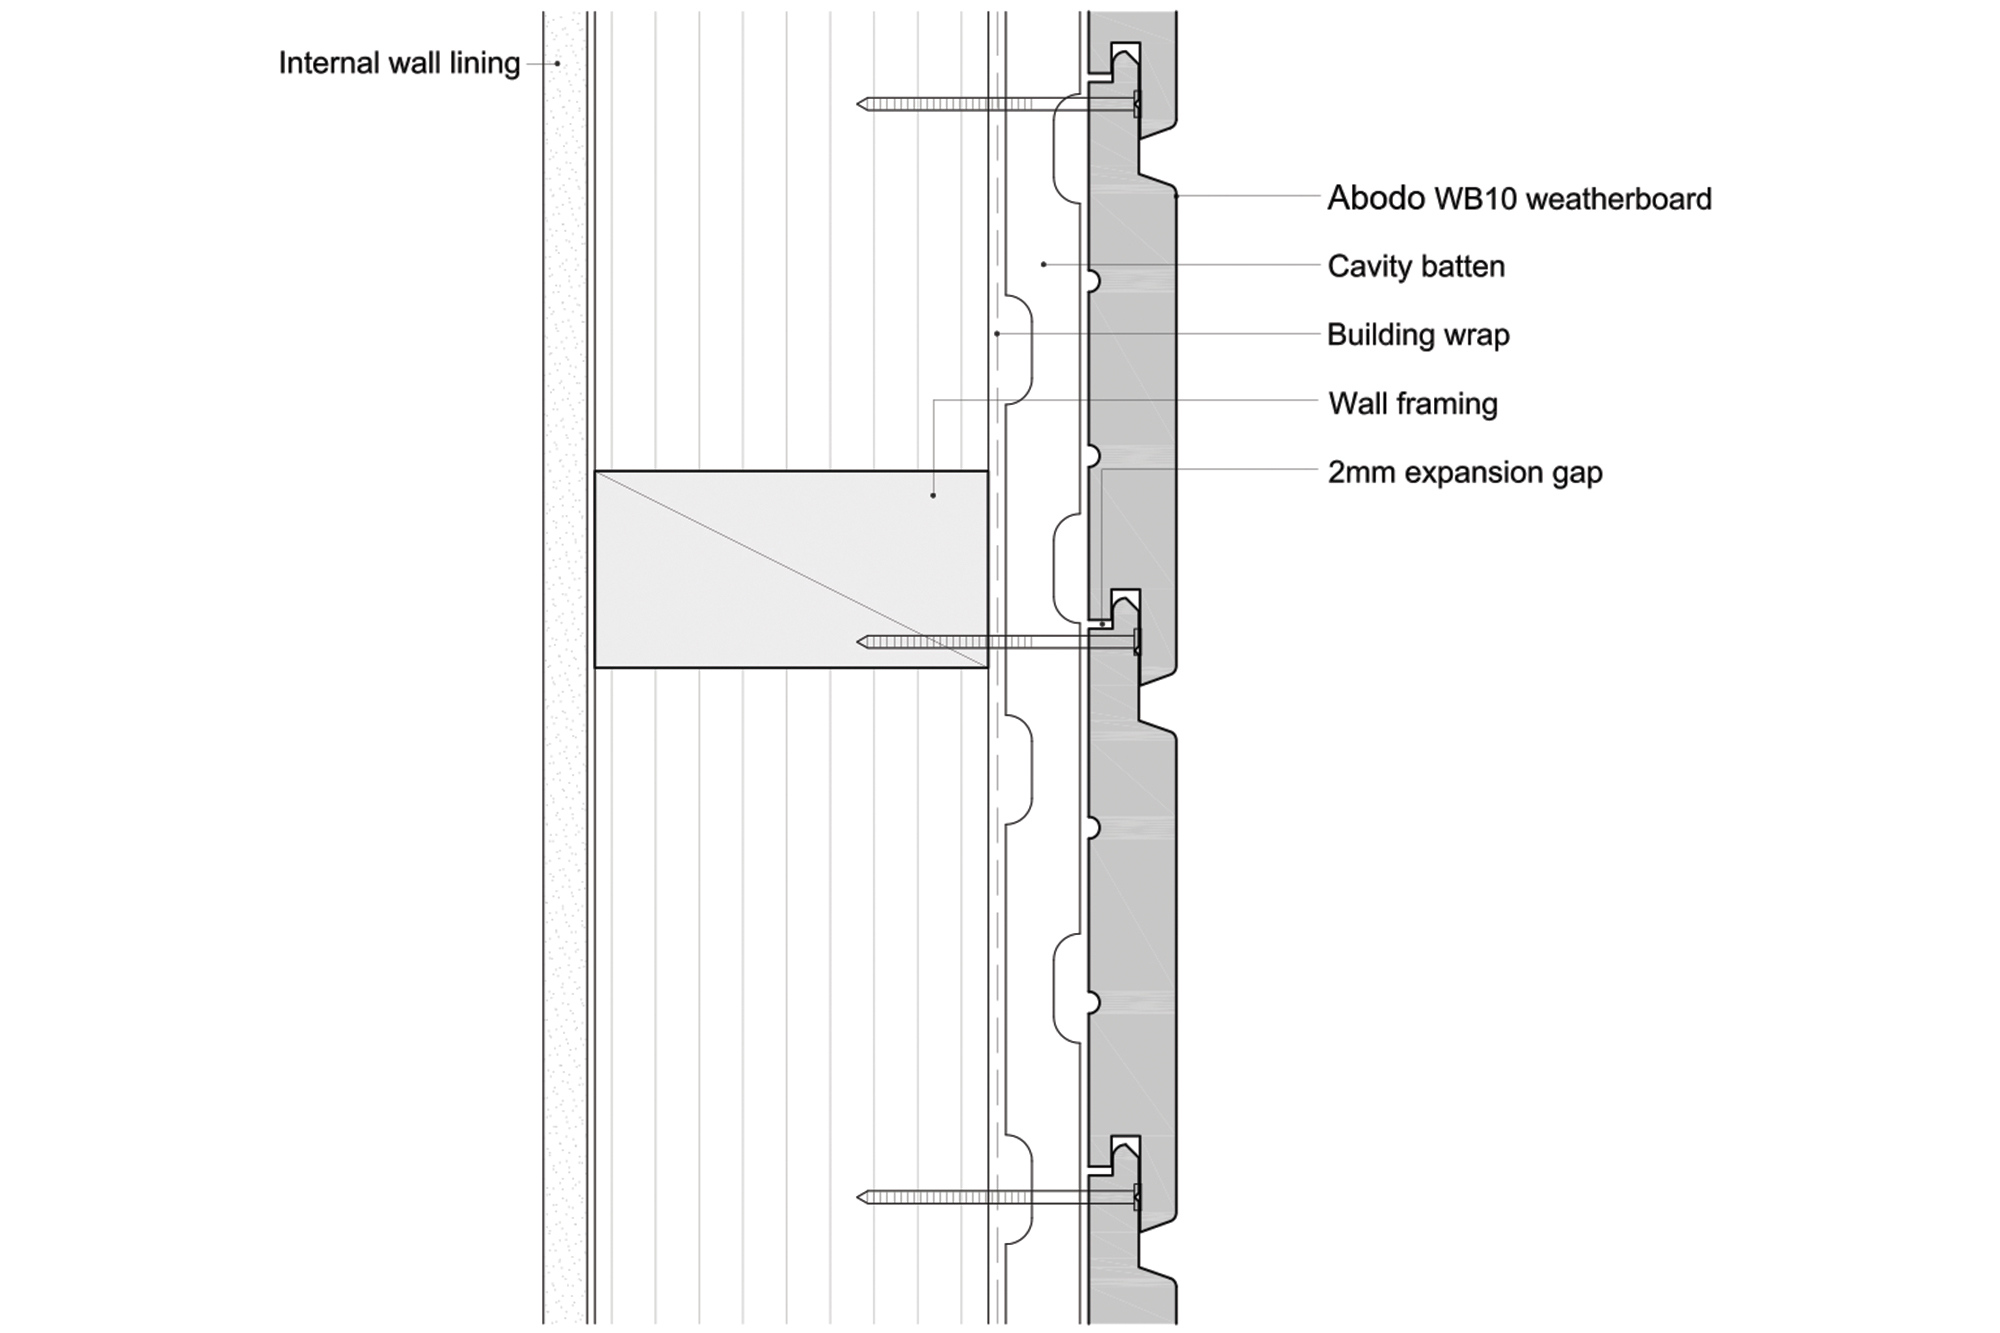
Step 2: Install the breather membrane (continuous, taped where needed)
Install the breather membrane shingle-style so water sheds downwards. Overlap and tape per the membrane manufacturer guidance. The aim is simple: if water gets behind the boards, it meets a water-shedding layer and drains out, rather than soaking the structure.
- Keep membrane continuous around openings.
- Use proper tapes at junctions and penetrations.
- Avoid “fish mouths” and gaps that funnel water inward.
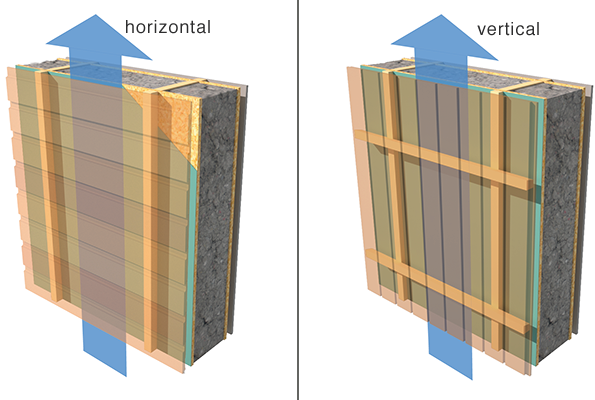
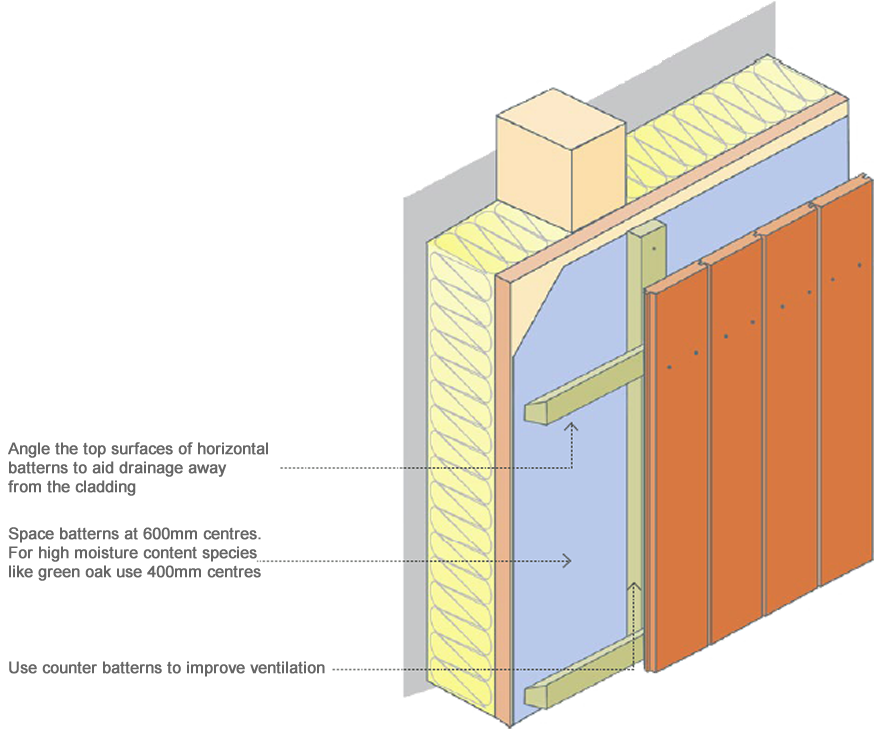
Step 3: Battens and cavity strategy (this is where performance is won)
The battens create the ventilation cavity and provide the fixing line for boards. In many builds, you’ll use vertical battens for horizontal cladding. For vertical cladding, you often need counter-battens to preserve vertical airflow (because vertical boards can’t be fixed to vertical battens without blocking the drainage/air path).