
- Subframe: C16 treated softwood joists at maximum 400mm centres. Minimum 50mm ground clearance — non-negotiable. All face fix and secret fix profiles share these requirements.
- Fixings: A4 stainless steel throughout — face fix 5mm×60mm screws or Brofix clips for secret fix. No galvanised, no standard steel.
- Board gaps: 5–6mm between boards. Consistent throughout. ThermoWood moves less than softwood but seasonal gaps still required.
- Pre-drill board ends: Within 150mm of any board end — ThermoWood is slightly more brittle than untreated pine. Prevents splitting.
- End grain sealing: Apply exterior oil to every site-cut end immediately after sawing.
- No pre-oiling required: ThermoWood does not need oiling before or after installation for durability.
- Brofix clips: 5–7 per m² at 400mm joist spacing. One A4 stainless screw per clip into joist.
ThermoWood decking installation follows standard deck construction principles with a small number of species-specific details that make a meaningful difference to the finished result. Pre-drilling board ends, using only A4 stainless fixings, and understanding how the Brofix hidden fastener system works are the three things an installer familiar with softwood decking needs to know that are different for ThermoWood. This guide covers the complete installation sequence — subframe construction, laying the boards, face fix versus secret fix, the Brofix system step by step, and the common mistakes that lead to board splitting, fixing corrosion, and deck movement. Everything in one place for both DIY installers and professional contractors.
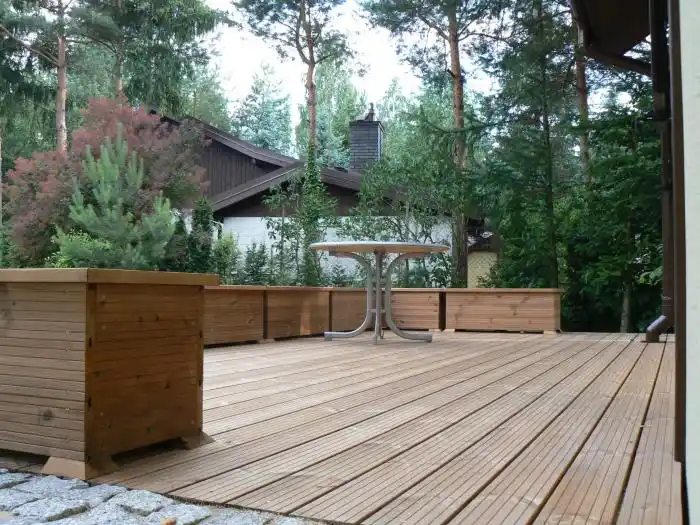
ThermoWood grooved decking boards — the machined groove on the board edge accepts the Brofix hidden fastener clip, producing a completely clean deck face with no visible fixings. The grooved profile is available in 26x117mm and works with all Brofix clip variants.
What Is Different About Installing ThermoWood Versus Softwood
An installer with experience of pressure treated softwood decking will find ThermoWood installation straightforward — the construction sequence is identical and the material is easier to work with in several respects (lighter boards, no preservative residue, no green tint). The three things that are genuinely different:
- Pre-drill board ends: ThermoWood is slightly more brittle than untreated pine due to the thermal modification. Driving screws within 150mm of a board end without pilot drilling can cause splitting along the grain. A 3mm pilot drill used at all board ends eliminates this risk completely — add 10–15 seconds per board end to installation time
- A4 stainless fixings only: ThermoWood has a lower pH than standard softwood — its modified chemistry accelerates corrosion of standard steel and galvanised fixings more quickly than untreated pine. A4 stainless is mandatory, not optional
- No pre-treatment needed: Do not oil or treat ThermoWood before installation. No primer, no end grain preservative treatment, no pre-installation oiling is required or recommended. Just seal site-cut ends with exterior oil after sawing
Step 1 — Building the Subframe
Map out joist positions at 400mm centres across the full deck footprint. Mark the ledger board position if the deck is attached to a building. Confirm that the finished deck surface will be at least 150mm below any DPC (damp proof course) on adjacent walls — building regulations requirement for decks adjacent to buildings.
Fix adjustable stainless steel post bases at each corner and at intermediate points — typically every 1.5–1.8m along each joist run. Adjustable bases allow the subframe to be levelled precisely without embedding timber in concrete. Set perimeter frame from C16 minimum grade pressure treated softwood at the same height on all sides. Check for square diagonally before proceeding.
Fix C16 treated softwood joists using joist hangers at the perimeter frame — never notch joists into the perimeter frame as this weakens both elements. Maximum 400mm centres for all 26mm ThermoWood profiles. Add noggins between joists at 1.8m intervals to prevent lateral movement. Confirm minimum 50mm clear air gap between joist bottom and ground level or membrane surface throughout.
Lay a UV-stable weed control membrane across the full deck footprint before boarding. Overlap joints by 150mm minimum. The membrane suppresses vegetation growth beneath the deck and helps maintain an even, dry surface under the subframe — improving airflow and reducing biological risk to the lower subframe timbers.
The single most common cause of premature deck failure — on any species — is insufficient ground clearance. Subframe joists within 30–40mm of the ground stay wet between rain events, never fully drying. Continuous moisture drives decay in the subframe regardless of the board species above. Minimum 50mm is the recommended clearance — 75mm or more in shaded positions with poor drainage. Measure this at the lowest point of the subframe, not the average. Getting this right at installation costs nothing. Getting it wrong costs the full replacement price of the deck.
Step 2A — Face Fix Installation (26x117mm)
Start from the most visible edge of the deck — typically the edge facing the garden or the house. Set the first board parallel to this edge with a 5mm gap at the perimeter frame. Use spacers (5mm tile spacers work well) to maintain consistent gaps throughout installation. Check the first board is straight and square before fixing — this sets the alignment for every subsequent board.
Two A4 stainless 5mm × 60mm decking screws per joist per board, positioned 20–25mm from the board edge. Pre-drill with a 3mm pilot drill at any fixing point within 150mm of a board end. Countersink each fixing so the screw head sits flush with the board surface — a proud screw head is a trip hazard and an entry point for moisture. Drive screws firmly but do not overtighten — over-driving compresses the surface fibres and creates a visible dip at each fixing point.
Use 5mm spacers between every board pair throughout. ThermoWood's low equilibrium moisture content (4–6%) means it moves less than softwood — but seasonal expansion still occurs and consistent gaps are needed to prevent board contact in warm humid periods. Inconsistent gaps are immediately visible on a finished deck and are impossible to correct without removing boards.
Any site cut through ThermoWood exposes the unmodified interior timber at the end grain. Apply exterior wood oil — Koopmans Houtolie works well — to every cut end immediately after sawing, before the board is fixed in position. End grain is the primary moisture entry point. This step takes seconds per cut and significantly improves the long-term performance of board ends near the perimeter.
Step 2B — Secret Fix Installation — Brofix System Step by Step
The Brofix hidden decking fastener system is used with all three ThermoWood secret fix profiles — grooved 26x117mm, smooth 26x140mm, and brushed 26x140mm. The system is simple once the principle is understood: each clip holds the previous board down while positioning the next board.
The first board at the deck edge is face-fixed into the perimeter frame with two A4 stainless screws per joist position — these fixings are concealed by the fascia board fitted at the end. Pre-drill at board ends. This first board establishes the alignment for all subsequent boards. Check it is straight and parallel to the deck edge before proceeding.
Slide a Brofix clip into the groove on the exposed edge of the first board at each joist crossing. The clip tab faces outward — it will engage the groove of the next board. Fix each clip to the joist with a single A4 stainless screw through the clip's pre-drilled hole. The clip both holds the current board down and creates the spacing for the next board. At 400mm joist centres, you need one clip per joist crossing per board — typically 5–7 clips per linear metre of board run.
Offer up the next board with its groove aligned over the protruding tab of the clips from the previous board. Press or tap the board down with a rubber mallet until the groove fully engages the clip tabs. The clip spacing is pre-set for the correct 5–6mm board gap — no additional spacers needed. Check the board is flush at each end and properly seated on each clip before proceeding to the next clip row.
Insert clips into the groove of the newly laid board at each joist crossing and fix to the joist with A4 stainless screws. Repeat for every subsequent board across the deck. The last board at the far perimeter edge is face-fixed into the far perimeter frame, concealed by the fascia board on that edge.
Fix C16 treated softwood or matching ThermoWood fascia boards to the perimeter frame on all visible edges. These cover the face-fixed first and last boards, the perimeter frame, and any joist ends. Mitre corners at 45° for a clean finish. Fix with A4 stainless screws, pre-drilled at board ends.
At standard 400mm joist centres, allow 5–7 Brofix clips per m² of deck area. For a 20m² deck, order 100–140 clips — round up to the nearest pack size. Clips are supplied in boxes of 50 and 100 units. Order your clips with your boards so everything arrives together — there is no reason to delay installation waiting for fixings to arrive separately.
Common ThermoWood Decking Installation Mistakes — and How to Avoid Them
| Mistake | Consequence | How to avoid |
|---|---|---|
| Not pre-drilling board ends | Board splits along grain at fixing point | 3mm pilot drill at all fixings within 150mm of board ends. Takes seconds per fixing. |
| Galvanised or steel fixings | Corrosion within 3–5 years — rust staining at every fixing point | A4 stainless throughout. No exceptions. Check packaging before ordering. |
| Insufficient ground clearance | Subframe stays wet — decay within 5–10 years regardless of board species | 50mm minimum at every point. Use adjustable post bases to set level correctly. |
| Inconsistent board gaps | Visible variation across finished deck — cannot be corrected without removing boards | Use 5mm tile spacers consistently throughout. Brofix clips self-space — use them correctly. |
| Not sealing cut ends | Moisture ingress at board ends — accelerated end-grain deterioration | Apply exterior oil to every cut end immediately after sawing. 30 seconds per cut. |
| Joists above 400mm centres | Board deflection under load — fixing fatigue over time | Set layout before boarding. 400mm centres maximum for all 26mm profiles. |
| Pre-oiling boards before installation | Oiled board faces reduce Brofix clip grip in grooves — unnecessary for durability | Do not oil ThermoWood before installation. Seal cut ends only. Oil after if wanted for colour. See our ThermoWood maintenance guide and ThermoWood worth it guide for the full picture. |
After Installation — What to Do (and Not Do)
- Do not oil immediately after installation — allow the deck to weather for at least 3–6 months before applying any oil. Fresh ThermoWood boards are at their lowest moisture content and may not absorb oil as well as weathered boards. If colour maintenance is wanted, apply oil in the first autumn after installation
- Do allow natural weathering — if you are happy with the silver-grey weathered appearance, do nothing. ThermoWood will transition from honey-brown to silver-grey over 18–24 months. No intervention is needed and no harm occurs during this process
- Do clean annually — brush and wash with dilute exterior wood cleaner every 1–2 years to prevent algae accumulation. See our timber decking cleaning guide for the full technique
- Do not apply paint or varnish — film-forming coatings trap moisture under ThermoWood's surface and will fail by peeling within 2–3 years. Penetrating oils only if any finish is wanted
- Do inspect fixings after the first winter — ThermoWood moves less than softwood but the first seasonal cycle sometimes reveals boards that have shifted slightly. A brief walk of the deck in spring to check for any proud screw heads or raised clips is good practice in year one
How do you install ThermoWood decking?
C16 treated softwood subframe at 400mm joist centres, minimum 50mm ground clearance, weed membrane, then fix boards face-fix with A4 stainless screws or Brofix hidden fasteners for secret fix profiles. Pre-drill board ends within 150mm. Leave 5–6mm gaps. Seal all cut ends with exterior oil. No pre-treatment needed.
What joist spacing should I use for ThermoWood decking?
Maximum 400mm centres for all ThermoWood 26mm decking profiles. Never exceed this for any profile. Use C16 minimum grade pressure treated softwood for all subframe elements.
How does the Brofix secret fix system work?
Each stainless steel Brofix clip slides into the board groove and fixes to the joist with one A4 stainless screw. The next board's groove slides over the clip tab — locking the previous board down and setting the gap. No fixings visible on deck face. 5–7 clips per m² at 400mm joist centres.
What fixings should I use for ThermoWood decking?
A4 stainless steel only. Face fix: 5mm × 60mm A4 stainless decking screws, countersunk flush. Secret fix: Brofix A4 stainless clips plus one A4 stainless screw per clip into joist. Never galvanised or standard steel — corrodes within 3–5 years and causes rust staining.
ThermoWood Decking + Brofix — Complete Supply from UK Stock
We supply all ThermoWood decking profiles and Brofix hidden fasteners from UK stock. Order boards and clips together in a single delivery. Tell us your deck dimensions for a precise board quantity, clip count, and full material list. Nationwide delivery 7–14 days.