Timber cladding detail design is where the difference between a high-performance facade and a problematic one is determined. The boards, the species, and the profile are chosen at specification stage — but it is the corner details, window reveals, base details, and junction design that decide whether the system performs correctly for 20–40 years or begins to fail within 5. This guide covers every standard timber cladding detail required for a UK project — what each detail does, how it should be designed and built, the common mistakes at each junction, and where to download our standard detail drawings for use on your own projects.
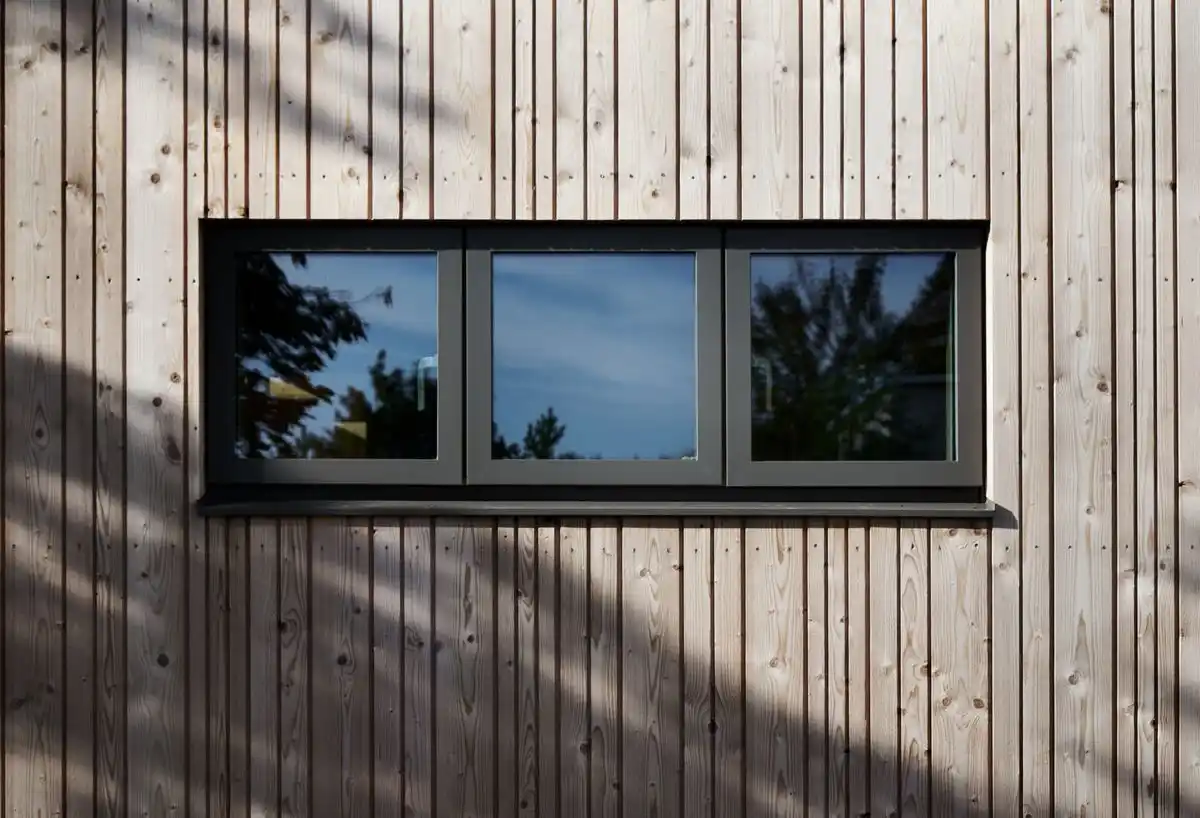
Vertical shadow gap cladding on a contemporary UK house — the precision of the board alignment, the consistency of the shadow line, and the clean termination at every junction reflects correct detail design from the start of the project. Good detailing is invisible when done right; it only becomes visible when done wrong.
Why Timber Cladding Detail Design Matters UK
Every moisture failure in a timber cladding system starts at a junction. The board face — whether larch, ThermoWood, or Nordic spruce — rarely fails in isolation. What fails is the detail at the point where the cladding meets something else: a window frame, a corner, the ground, the eaves, or another material. These junctions are where water finds a way in, where ventilation is compromised, and where the system stops performing as designed.
The six details that matter most on any UK timber cladding project:
Where two cladding elevations meet at an external angle. The most visible detail on any clad building — and the most likely to fail without a correct corner post or mitred junction.
Where cladding boards terminate at window and door openings. The reveal must close the board ends, maintain the ventilated cavity into the opening return, and allow for differential movement.
Where the cladding terminates at the lowest point — ground level or DPC level. Minimum 150mm ground clearance, open ventilated base, insect mesh, and correct DPC integration.
Where the cladding terminates at the top — at eaves, at a soffit, or under a window sill. A correctly formed head flashing prevents water tracking back under the top board course.
The cross-section through the wall showing substrate, breather membrane, counter batten, support batten, ventilated cavity, and board profile — the foundation specification for the whole system.
On buildings over 11m — fire-rated cavity barriers at every floor level and around all openings. The detail must show barrier position, fixings, and junction with the batten system.
Timber Cladding Corner Detail UK — External Corner Post

Corner post installation — a 45x45mm solid timber corner batten fixed at the external corner before boards are run on either elevation. The boards butt to the corner post face on both elevations, producing a clean, weathertight junction that closes the board ends and maintains the continuous vertical element at the corner. Corner post and boards must be the same species — larch post with larch boards, ThermoWood post with ThermoWood boards.
The external corner is the most critical and most visible junction on any timber clad building. Two approaches are used in UK practice:
Option 1 — Corner post (recommended)
A 45x45mm corner post timber cladding UK is fixed vertically at the corner before boards are fixed on either elevation. The corner post is fixed through the batten system into the structural corner — typically two A4 stainless steel screws per metre height, alternating faces. Boards butt to the corner post face on both elevations. This produces a clean, consistent external corner that closes all board ends and weathers evenly across both faces. Download our corner batten detail drawing for the full specification.
Key requirements for the corner post detail:
- Corner post must be the same species as the cladding boards — larch post with larch boards, ThermoWood post with ThermoWood boards. Different species weather at different rates, producing colour inconsistency at the most visible point on the building
- Corner post height must equal the full cladding height plus 10mm at base (for ground clearance) and minus 5mm at top (to allow for head flashing overhang)
- All end grain on the corner post sealed before installation — top and bottom cut ends particularly vulnerable
- Corner post fixed before any cladding boards — it is the reference element that boards run to on both elevations
Option 2 — Mitred corner (high specification)
Boards on both elevations are cut at 45° and mitred together at the corner — no corner post visible. The most architecturally refined corner detail but also the most technically demanding. Requires extremely accurate cutting, precise batten alignment on both elevations, and careful allowance for differential movement between the mitre faces. Mitred corners are specified on high-end residential and commercial projects where the visual priority is an uninterrupted board face across the corner. Not recommended for standard residential projects or profiles with complex face geometry.
Timber Cladding Window & Door Reveal Detail UK
Window reveal detail on a garden room — the reveal board closes the cladding board ends at the window opening, returns into the opening reveal, and maintains a weathertight junction at the most moisture-exposed point on any clad elevation. The junction between cladding and window frame is where most exterior cladding moisture problems originate — a correctly detailed reveal eliminates this risk.
The window and door reveal is the most moisture-critical junction on any clad building. Rain hitting the cladding face runs down to window heads, sills, and reveals — and a poorly designed junction allows it to track behind the cladding and into the wall construction. Download our window and door reveal detail drawing for the full specification.
The correct reveal detail for UK timber cladding:
- Reveal board at jambs: A timber cladding reveal board UK fixed into the window opening return on both jambs before cladding boards reach the opening. The reveal board closes the cladding board ends and provides a clean junction with the window frame. Same species as the cladding boards
- Head flashing: A minimum 40mm projection head flashing above every window and door opening — aluminium or stainless steel, with a formed drip edge on the underside. The flashing must project far enough to prevent driving rain reaching the top board course above the window
- Sill detail: The cladding boards below the window sill must be cut back to allow the window sill to project and drain clear of the cladding face. A minimum 25mm sill projection with a drip groove on the underside prevents water tracking back under the sill and into the cladding junction
- Mastic joint: A flexible mastic seal between the reveal board and the window frame accommodates differential movement and seals the junction against wind-driven rain. Use a grey or colour-matched mastic — never a rigid filler that will crack with movement
- Cavity continuity: The ventilated cavity must be maintained into the window opening return — the reveal board is fixed over the cavity, not closing it. Insect mesh at the reveal opening prevents pest ingress into the cavity
Window detail at 52 Clarence Avenue, Clapham — a completed TCS supply and install project showing the reveal board, head flashing, and board termination at the window junction. The clean, precise junction between the Siberian larch cladding and the window frame is achieved through correct detail design from the start of the project — not adjusted on site.
Timber Cladding Horizontal Section — Batten System Specification UK
ThermoWood cladding batten system — the counter and support batten arrangement that creates the ventilated cavity is the most important element of the entire cladding system specification. This detail shows the angled batten approach used to achieve precise board alignment on complex elevations — the batten system determines the cladding's long-term performance far more than the board species or profile.
The horizontal section through a correctly specified timber cladding system — from wall substrate outward:
| Element | Specification | Notes |
|---|---|---|
| Structural substrate | Masonry, timber frame, or SIP panel | Must be sound, dry, and defect-free before cladding system is applied |
| Breather membrane | Vapour-permeable, minimum 0.02 Sd value | 150mm overlapping laps, all taped. Continuous, no gaps or tears |
| Counter battens (vertical) | 25x38mm minimum, C16 treated softwood | Fixed into structural wall at max 600mm vertical centres. A4 stainless or HDG fixings |
| Ventilated cavity | Minimum 25mm clear | Open at base (insect mesh) and at top — continuous airflow essential |
| Support battens (horizontal) | 25x50mm minimum, C16 treated softwood | Fixed to counter battens at max 600mm vertical centres. Checked level across elevation |
| Cladding boards | Species and profile as specified | A4 stainless fixings. Pre-drilled within 150mm of ends. Min 3mm board gaps |
Timber Cladding Base Detail UK — Ground Level Junction
The base detail — where the cladding system terminates at ground or DPC level — is the second most common source of moisture problems after window reveals. The correct base detail for UK timber cladding:
- Minimum 150mm ground clearance timber cladding UK: The bottom edge of the lowest cladding board must be at least 150mm above finished ground level — significantly higher than decking (50mm) because wall cladding is directly exposed to ground splash. On sloping sites, measure at the highest ground point adjacent to the cladding
- Open ventilated base: The ventilated cavity must be open at the base — never sealed with a solid closure board or mastic that would prevent airflow. A stainless steel or plastic insect mesh covers the cavity opening to prevent pest ingress while maintaining ventilation
- DPC integration: The breather membrane must lap over the existing DPC or be taken down to DPC level on masonry walls. This prevents moisture bridging at the base of the wall — one of the most common causes of dampness in clad buildings
- Starter board: On some profiles (shadow gap, shiplap) a starter strip or feather strip is required at the base to tilt the first course board to the correct angle — matching the angle of subsequent courses above. On a horizontal shadow gap system this is a thin feather strip fixed behind the first board
- Ground surface: The ground immediately below the base of the cladding should be gravel or hard landscaping rather than soil — see our cladding maintenance guide for long-term care once installed — bare soil holds moisture and promotes splash. Where paving is adjacent, ensure drainage falls away from the building base
Siberian larch rainscreen cladding external corner detail — the open-joint rainscreen system presents the most complex corner detail of any cladding profile. The board ends must be returned cleanly at the corner while maintaining the open joint character on both elevations. A hidden fixing system with a mitred corner board achieves the cleanest result on rainscreen installations. Contact our detail design service for project-specific rainscreen corner drawings.
TCS Cladding Detail Design Service UK
Our cladding detail design service produces project-specific detail drawings for architects, developers, and contractors across the UK. We work with the profiles and species we supply — meaning our details are drawn for real boards with real dimensions, not generic timber cladding abstractions. What the service covers:
- Full detail package: External corner, internal corner, window and door reveal, head flashing, base detail, eaves detail, horizontal section, and vertical section — all drawn to scale for your specific wall build-up, profile, and species
- NBS H92 specification clauses: We can produce NBS H92-format specification clauses for all standard timber cladding details — compatible with standard architectural specification practice. See our timber cladding specification guide for the full NBS H92 framework and our timber cladding installers guide for correct installation practice
- Fire compliance details: For buildings over 11m — cavity barrier positions at floor levels and around openings, drawn as part of the cladding detail package. Compatible with Approved Document B compliance documentation
- DWG and PDF output: All drawings supplied in PDF and AutoCAD DWG format — ready for insertion into architectural drawing packages and building control submissions
- Turnaround: Standard detail packages typically 5–10 working days. Contact us with your wall build-up, cladding species and profile, and building height to discuss requirements and turnaround
The single most effective change any architect or specifier can make to timber cladding performance on UK projects is to design the junction details at the same time as the board and species specification — not as an afterthought after boards have been ordered. The corner detail determines the corner post size, which determines the batten layout, which determines the board run lengths on both elevations. The reveal detail determines the reveal board size, which must be ordered with the cladding boards. Designing junctions after boards are on site means improvising details that should have been engineered. Contact our detail design service at the specification stage — not during installation. Enquire about our detail design service →
What timber cladding details do I need for a UK project?
A complete detail package typically includes: external corner, internal corner, window and door reveal, head flashing, base detail, eaves detail, horizontal section, and vertical section. For buildings over 11m add cavity barrier details at floor levels and around openings. Download our standard corner and reveal details above, or contact our detail design service for a project-specific package.
What size corner post for timber cladding UK?
45x45mm solid timber corner post is the standard specification for most UK residential and commercial timber cladding projects. It provides a visible corner element wide enough to close the board ends on both elevations while remaining proportionate to standard board widths. Must be the same species as the cladding boards — larch post with larch boards, ThermoWood post with ThermoWood boards. See our corner batten detail drawing download above for the full specification.
Can Timber Cladding Specialists produce cladding detail drawings UK?
Yes — our cladding detail design service produces project-specific drawings for architects, developers, and contractors. Full detail packages in PDF and DWG format covering all standard junctions. We also provide free standard detail drawings — download the corner and reveal details above. Contact us with your wall build-up, species, profile, and building height for a detail design quote.
What is the minimum ground clearance for timber cladding UK?
150mm minimum between the bottom edge of the lowest cladding board and finished ground level. On sloping sites, measure at the highest adjacent ground point. The base of the cladding must remain open for ventilation — covered with insect mesh but never sealed. DPC integration at base is essential on masonry walls.
How do I detail timber cladding around windows UK?
Reveal boards at both jambs, head flashing with minimum 40mm projection and drip edge above the opening, sill detail with 25mm minimum projection below the window. Mastic seal between reveal board and window frame. Ventilated cavity must be maintained into the reveal. Download our window reveal detail drawing above for the complete specification.
Cladding Detail Design Service — Project-Specific Drawings
We produce project-specific timber cladding detail drawings for architects, developers and contractors across the UK. Full detail packages in PDF and DWG. Corner posts, window reveals, base details, horizontal and vertical sections, cavity barrier details, and NBS H92 specification clauses. Contact us with your project details for a quote and turnaround estimate.