Finding a qualified timber cladding installer in the UK is harder than it looks. Timber cladding installation is not a standard carpentry skill — it requires specific knowledge of ventilated batten systems, breather membrane installation, stainless fixing specification, profile-specific board fixing techniques, and junction detailing at corners, windows, and eaves. A cladding installation done incorrectly can fail within 5 years regardless of how good the boards are. This guide covers how to find a reliable timber cladding installer in the UK, what questions to ask before hiring, what a correct installation looks like at each stage, what it costs, and how the TCS supply and install service works for residential and commercial projects nationwide.
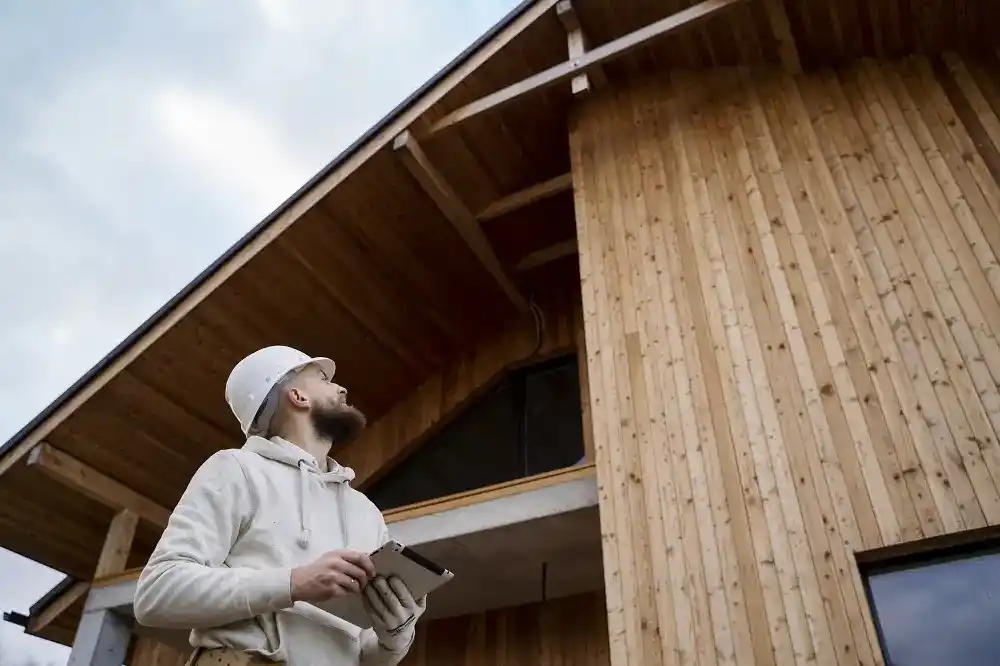
Timber cladding on a UK residential building — a completed installation using the correct ventilated batten system, A4 stainless fixings, and proper junction detailing throughout. The quality of the finished facade is determined as much by the installation as by the boards — a correctly installed cladding system performs for 20–40 years; a poorly installed one can fail in under 5.
Why Timber Cladding Installation Quality Matters
The boards are only half the specification. The most common cause of premature timber cladding failure in the UK is not board quality — it is incorrect installation. The four installation errors that cause the most long-term problems:
- No ventilated cavity: Boards fixed directly to masonry or sheathing without a counter batten and clear ventilated cavity behind them cannot dry out after rain. Moisture accumulates behind the boards, driving decay from the back face inward. Even Class 3 larch or Class 2 ThermoWood will deteriorate prematurely without adequate ventilation. A 25mm clear cavity minimum is non-negotiable
- Wrong timber cladding fixings UK: Galvanised or zinc-plated screws corrode in contact with the tannins and moisture present in exterior timber cladding — typically within 3–5 years. The rust bleeds visibly through the board face, staining the entire elevation. A4 stainless steel fixings are the only correct specification for any exterior timber cladding, regardless of species or profile
- No pre-drilling: Boards split at ends and edges when fixings are driven without pre-drilling, particularly in denser species like Siberian larch and ThermoWood. Splits provide direct moisture entry paths into the board end grain — the most vulnerable part of any cladding board. Every fixing within 150mm of a board end and 50mm of a board edge must be pre-drilled
- Poor junction detailing: The junction between cladding and windows, doors, eaves, sills, and corners is where most cladding moisture problems originate. Head flashings that don't project far enough, sill details that allow water to track back under the boards, and corner posts that don't fully close the cladding profile at external angles all create moisture entry points that compound over time. Junction detail is what separates a competent cladding installer from a general carpenter who has fixed some boards to a wall
How to Find a Qualified Timber Cladding Installer UK

Batten system installation on a residential building — correctly installed counter battens (vertical, fixed into masonry) and support battens (horizontal, fixed over the counter battens) create the ventilated cavity that is essential for long-term cladding performance. Ask any prospective installer to explain how they install this system — their answer tells you immediately whether they understand timber cladding.
The most reliable routes to a qualified timber cladding installer in the UK:
- Through your cladding supplier: The best route. Specialist cladding suppliers like TCS either offer their own installation service or can recommend vetted installers who regularly work with their boards and understand the correct specification. A supplier who installs their own boards has the greatest incentive to ensure the installation is correct — their reputation is attached to both the material and the workmanship
- Recommendations from completed projects: Ask any prospective installer for photos of 2–3 completed timber cladding projects specifically — not general carpentry or joinery. Visit one if possible. Look at the corner details, the junction at window reveals, and the consistency of the board alignment. These tell you far more about installation quality than any certificate
- Ask the right questions upfront: See the checklist below — a qualified timber cladding installer will answer all of these without hesitation. A general carpenter who occasionally fixes cladding boards will struggle with several of them
Questions to Ask a Prospective Timber Cladding Installer
"We can fix it straight to the wall without battens" · "Stainless screws aren't necessary — galvanised is fine" · "We don't need to pre-drill" · "The membrane isn't essential on this job" · "We've done lots of decking — cladding is the same thing"
What Correct Timber Cladding Installation Looks Like — Stage by Stage
Breather membrane and batten system on a garden room — the vapour-permeable membrane is fixed to the structural wall first, with minimum 150mm overlapping laps all taped. Vertical counter battens are then fixed through the membrane into the wall, followed by horizontal support battens at maximum 600mm centres. This is the foundation that determines whether the cladding performs correctly for 20–40 years.
Stage 1 — Preparation
- Wall substrate checked for defects — any cracks, failed pointing, or damp issues addressed before cladding begins
- All boards acclimatised on site for a minimum of 48 hours before installation — particularly important for ThermoWood which should not be installed wet
- End grain sealer or exterior oil applied to all cut board ends on delivery and immediately after any site cuts
- Chalk line or laser level established to ensure the first course is perfectly horizontal — all subsequent courses depend on this
Stage 2 — Breather membrane
- Vapour-permeable breather membrane fixed to wall substrate — starting at the base, working upward with each course overlapping the one below by minimum 150mm
- All horizontal and vertical laps taped with compatible membrane tape
- Membrane taken around corners and into window and door reveals before battens are fixed
- No tears, punctures, or gaps — any damaged sections cut out and patched before battens go on
Stage 3 — Counter and support battens
- 25x38mm minimum treated softwood counter battens fixed vertically through membrane into structural wall — into masonry with appropriate wall plugs, or into timber frame studs at correct centres
- Counter battens checked for plumb before fixing. Fixed at maximum 600mm vertical centres
- 25x50mm minimum treated softwood support battens fixed horizontally over counter battens at maximum 600mm vertical centres — checked for level across the full elevation width
- All batten fixings A4 stainless steel or hot-dipped galvanised minimum
Stage 4 — Board fixing
- First board course fixed at correct height — minimum 150mm ground clearance at base
- All board ends pre-drilled minimum 150mm from end before fixing — prevents splitting
- A4 stainless steel screws only — countersunk flush with board face, not over-driven
- Board alignment checked against level line every 3–4 courses
- End grain sealed immediately after each site cut
- Minimum 3mm board gap at all abutments and end joints (or as specified by profile)
Stage 5 — Junction detailing
- External corners: 45x45mm corner post fixed at each corner before boards are run — boards butt to corner post face
- Window and door reveals: reveal boards fixed into opening returns before boards reach the opening
- Head flashings: minimum 40mm overhang at eaves and horizontal projections — drip edge formed to prevent water tracking back
- Base detail: open at bottom — insect mesh fitted but no solid closure that would prevent ventilation
See our full how to fix timber cladding guide, our corner details guide, and our fixings guide for the complete technical specification.
A4 stainless steel fixings in external timber cladding — the fixing specification is one of the most reliable indicators of installation quality. A4 stainless is the only correct specification for exterior timber cladding in the UK. Galvanised or zinc-plated fixings corrode visibly within 3–5 years in contact with timber tannins and exterior moisture — the rust bleeds through the board face and cannot be removed without replacing the boards.
Timber Cladding Installation Cost UK — 2026 Prices
| Item | Cost | Notes |
|---|---|---|
| Installation labour (boards only) | £20–45/m² | Board fixing only — excludes batten system, membrane, and junction detailing |
| Batten system installation | £8–18/m² | Batten system cladding UK — counter and support battens, masonry fixings, labour and materials |
| Breather membrane | £4–8/m² | Supply and fix — included in most supply-and-install packages |
| Scaffold (typical house elevation) | £800–2,500 | Erection and 2-week hire — varies significantly by height and access |
| Siberian larch boards (supply) | £50.39–63.35/m² | Shadow gap, feather edge, log lap, rainscreen — ex VAT, inc. 15% waste |
| ThermoWood boards (supply) | £50.39–64.99/m² | Shadow gap, double shadow gap, triple shadow gap — ex VAT, inc. 15% waste |
| A4 stainless fixings | £3–6/m² | PFS+ C2 A4 stainless cladding screws — included in most packages |
| Total supply & install (larch) | £85–130/m² | All in — boards, battens, membrane, fixings, labour. Ex scaffold, ex VAT |
| Total supply & install (ThermoWood) | £90–140/m² | All in — boards, battens, membrane, fixings, labour. Ex scaffold, ex VAT |
See our timber cladding installation cost guide, our how much does it cost to clad a house guide, our timber cladding cost per m² guide, and our supply and install guide for full pricing breakdowns by species, profile, and project type. Use our timber cladding calculator to work out board quantities before requesting quotes.
TCS Supply & Install — Completed Projects
We supply and install timber cladding on residential and commercial projects across the UK. Our installation teams work exclusively with the boards we supply — Siberian larch, ThermoWood, Nordic spruce, charred SSB, and Douglas fir. We know the correct specification for each profile and species because we supply them every day. No subcontracting to general builders who have fixed cladding once. Contact us with your project details and we will provide a full supply and install quote. See our supply and install service page for the full scope of what we offer.
How do I find a timber cladding installer UK?
Through your cladding supplier — the most reliable route. Specialist suppliers like TCS offer their own supply and install service and can recommend vetted installers for projects they supply boards to. Alternatively, ask any prospective installer for photos of previous completed timber cladding projects specifically, and use the question checklist in this guide to verify their knowledge before hiring.
How much does timber cladding installation cost UK?
Installation labour typically £20–45/m². Total supply and install including Siberian larch boards, battens, membrane, and A4 stainless fixings: £85–130/m². ThermoWood supply and install: £90–140/m². Add scaffold separately — £800–2,500 for a typical house elevation. All prices ex VAT.
Can Timber Cladding Specialists install cladding UK?
Yes — we offer a full supply and install service for timber cladding projects across the UK. Residential and commercial. All species and profiles we stock. Contact us with your project details — elevation dimensions, species and profile preference, and location — and we will provide a full supply and install quote including lead times.
What fixings should a timber cladding installer use UK?
A4 stainless steel screws only — no exceptions. Galvanised or zinc-plated fixings corrode in contact with timber tannins and exterior moisture, typically within 3–5 years, causing rust staining that bleeds through the board face. If an installer quotes galvanised fixings, walk away. See our PFS+ C2 A4 stainless cladding screws in the fixings shop.
Do timber cladding installers need to use a batten system UK?
Yes — always. Boards fixed directly to masonry or sheathing without a ventilated batten system cannot dry out after rain. Moisture accumulates behind the boards, causing premature decay from the back face regardless of species or treatment. A minimum 25mm clear ventilated cavity behind the boards is non-negotiable for any exterior timber cladding installation in the UK.
Supply & Install Timber Cladding — UK Wide, Free Quote
We supply and install Siberian larch, ThermoWood, Nordic spruce, and charred SSB cladding on residential and commercial projects across the UK. All species. All profiles. Correct batten system, A4 stainless fixings, proper junction detailing throughout. Send us your project details for a full supply and install quote.