
- 7 steps from bare timber frame to finished cladding — membrane, counter battens, fixing battens, cladding installation, corners, and reveals.
- Species choice — Siberian larch for natural durability, ThermoWood for zero maintenance, Nordic spruce for budget builds.
- Common mistakes — the most frequent errors that cause premature failure and how to avoid them.
- Materials checklist — everything you need to order before starting, with quantities for a typical 4x3m garden room.
- Cost guide — materials for a typical 4x3m garden room cost £850–£2,050 depending on species.
Cladding a garden room is one of the most satisfying self-build tasks — the transformation from bare timber frame to finished exterior happens quickly, and the result defines how the building will look for the next 20–30 years. Done correctly, a timber-clad garden room requires minimal ongoing maintenance and weathers beautifully in a UK garden setting. Done incorrectly — wrong fixings, no membrane, boards fixed too close to the ground — problems develop within a few years that are expensive to put right. This guide walks you through every step in the correct sequence, from frame preparation to the finished cladding. For species costs see our garden room cladding cost guide, and for planning requirements see our planning permission for timber cladding guide.
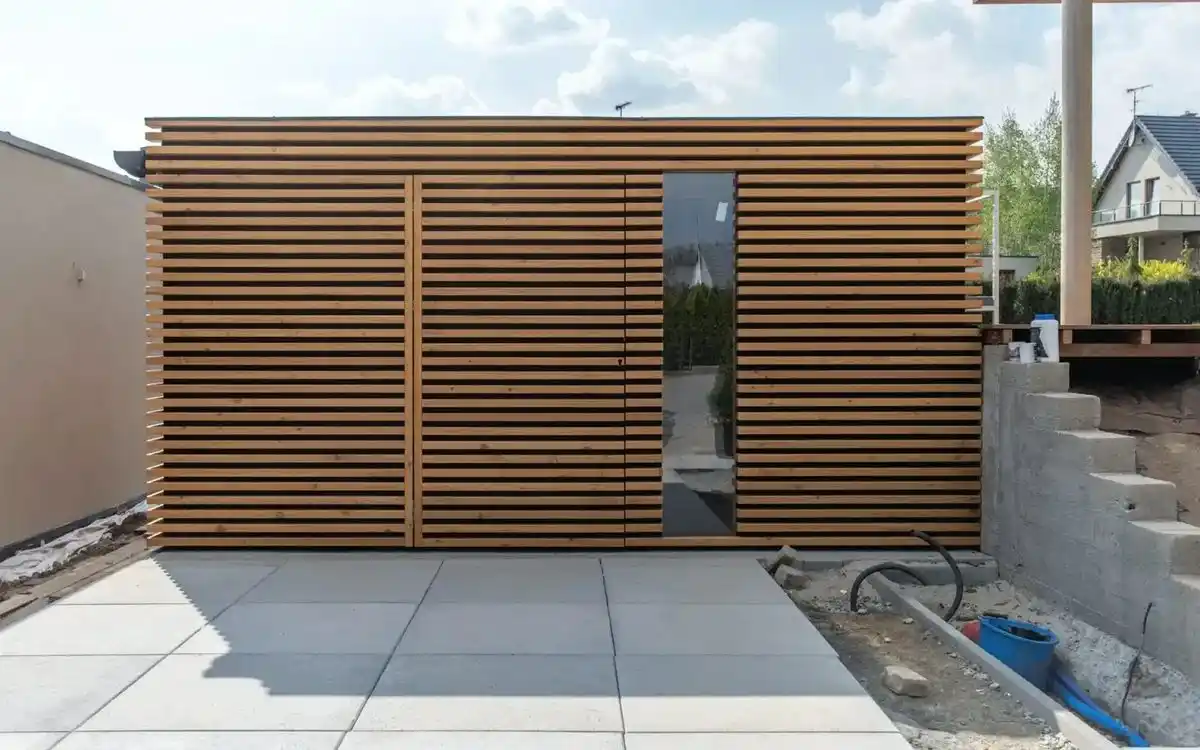
Completed garden room timber cladding — the finished result of a correctly installed ventilated cladding system. The clean lines, consistent board spacing, and precise corner details are achieved by following the correct installation sequence from the start.
What You Need — Materials Checklist
Before starting, order everything on this list. Running out of materials mid-installation is the most common cause of delays and quality issues — particularly with cladding where cutting to length creates waste and matching boards from different batches can cause colour variation.
| Material | Typical quantity — 4x3m garden room | Notes |
|---|---|---|
| Cladding boards | approx. 28m² (25m² + 10% waste) | Order with minimum 10% waste allowance — browse full range |
| Breather membrane | 1 roll (50m²) | Standard 1.5m wide roll covers a 4x3m room comfortably |
| Vertical counter battens | 25x50mm treated softwood — approx. 30 linear metres | Creates 25mm ventilated cavity — timber battens from stock |
| Horizontal fixing battens | 25x50mm treated softwood — approx. 80 linear metres | At 400–600mm centres depending on profile |
| A4 stainless steel screws | approx. 400–600 screws | A4 stainless cladding screws — never galvanised |
| Membrane staples | 1 box | For staple gun — 10–12mm crown staples |
| Membrane tape | 2 rolls | For sealing membrane joins and penetrations |
| End grain sealer / exterior oil | 1 litre | Apply to every site cut — Owatrol H4 wood protection |
| Preservative (spruce only) | 5 litres | Remmers HK Stain 3-in-1 — apply to all faces before installation |
Send us your garden room dimensions and chosen species and we will calculate the precise material quantity for your project, including the correct waste allowance. Getting the quantity right first time avoids both shortages and costly over-ordering. Contact our team at timbercladdingspecialists.co.uk/contact-us/ with your dimensions.
Choosing Your Cladding Species
For a full comparison of species and profiles for garden rooms see our garden room cladding guide.
The 7 Steps — How to Clad a Garden Room
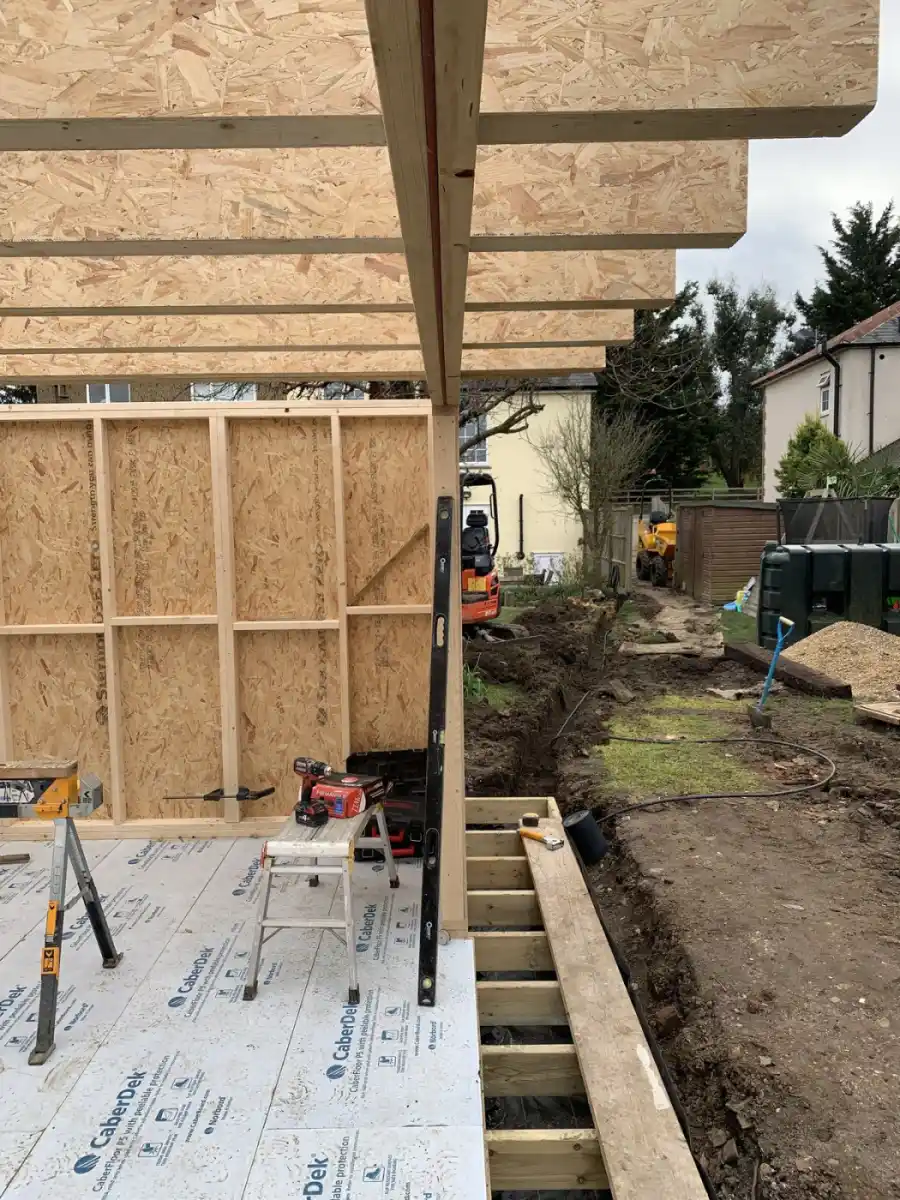
Garden room timber frame — the structural frame must be complete, square, and dry before any membrane or cladding work begins. Check all framing members are treated softwood or naturally durable timber.
Before any membrane or cladding goes on, the frame must be complete, structurally sound, and as dry as possible. Check the following:
- All framing members are treated softwood (C16 or C24 grade minimum) or naturally durable species
- The frame is square — measure diagonals on each elevation, they must be equal
- All faces of the frame that will be behind the cladding are accessible — any remedial work to the frame is far harder once cladding is on
- Ground clearance is minimum 150mm from the base of the lowest structural member to finished ground level — if it is less, address this before cladding
- Any penetrations through the wall — cable conduits, pipe sleeves — are already in place and sealed
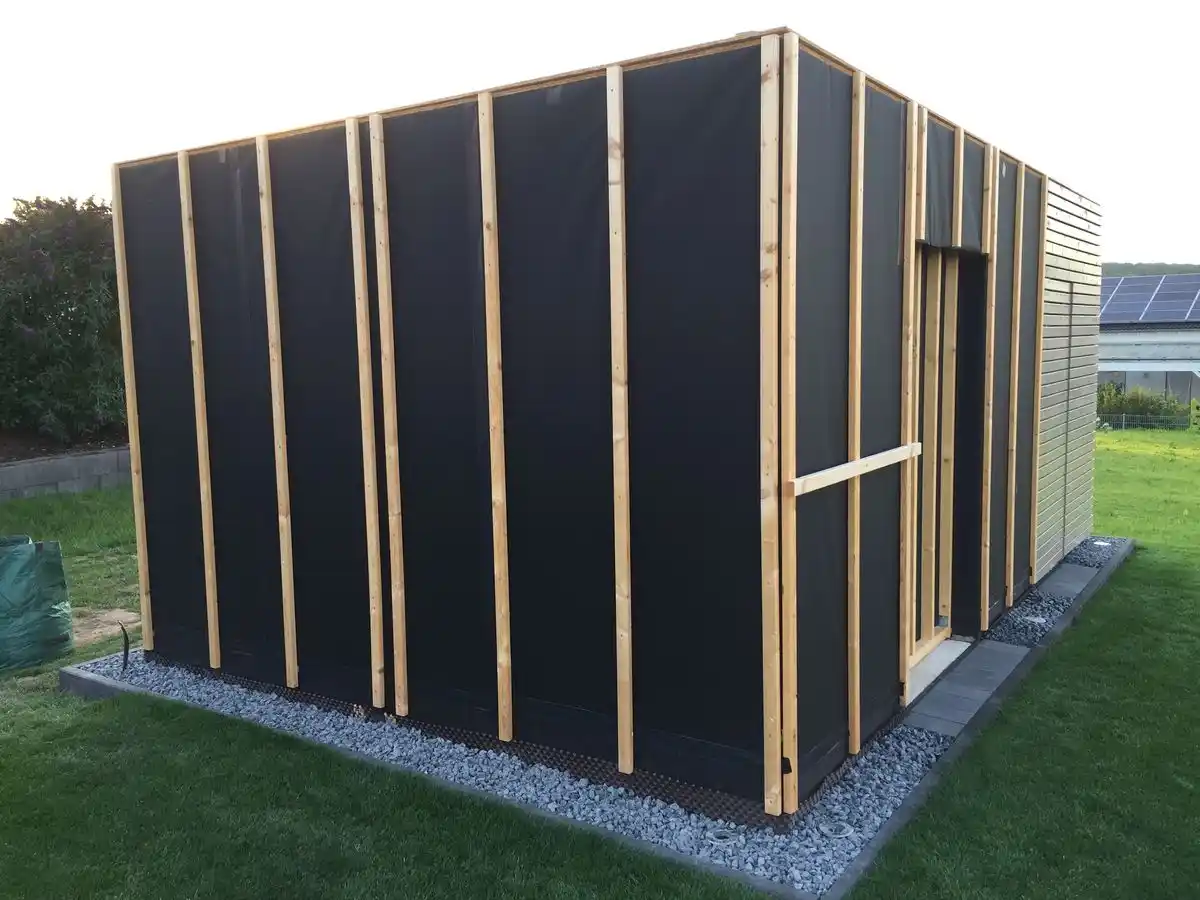
Garden room with breather membrane fixed — the membrane wraps the entire external face of the frame before any battens or cladding are installed. This is one of the most critical steps in the entire installation.
The breather membrane is one of the most important elements of the entire cladding system — it protects the structural timber frame from wind-driven moisture while allowing water vapour to escape outward. Never skip it or substitute it with standard polythene sheeting, which traps moisture rather than allowing it to escape.
- Start at the base of the wall and work horizontally upward — each course overlaps the one below by minimum 150mm so water cannot track upward behind the laps
- Staple at 300mm centres along the top edge of each course and at the framing members — the membrane must be taut with no sagging pockets that could hold water
- Tape all horizontal and vertical joins with membrane tape — particularly important at corners
- Fold the membrane neatly at external corners — do not cut it at corners, fold and staple
- Seal around any penetrations (cable conduits, pipes) with membrane tape immediately
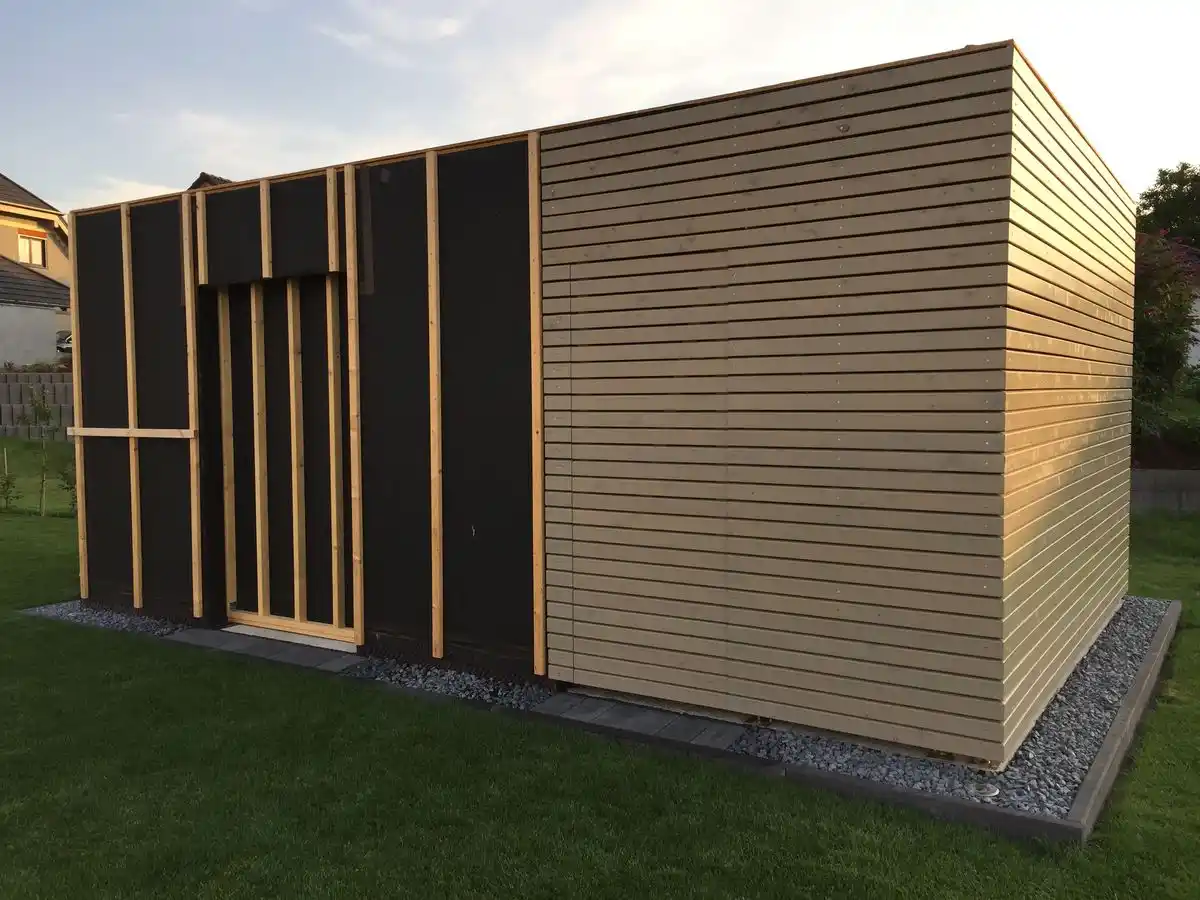
Vertical counter battens fixed over the breather membrane — these create the ventilated cavity between the membrane and the cladding. The cavity allows air movement and drainage, keeping both the cladding and the frame dry in service.
The vertical counter battens create the ventilated cavity between the membrane and the cladding — this cavity is what makes a rainscreen cladding system work. Air moves through the cavity, drying any moisture that gets behind the cladding before it can cause problems.
- Use 25x50mm treated softwood counter battens fixed vertically — 25mm depth creates the minimum recommended cavity
- Fix at 400–600mm centres into the structural framing members — screws must penetrate the frame by at least 40mm
- Use A4 stainless steel screws — the counter battens are the most exposed element to any moisture that gets behind the cladding and stainless fixings are essential
- Check each batten is plumb with a spirit level — any deviation here carries through to the finished cladding
- Leave the base of the cavity open at the bottom — fit a mesh insect barrier strip across the base to prevent pest ingress without blocking airflow
The horizontal fixing battens provide the structural fixing line for each cladding board and are what the boards are actually screwed or nailed into. They must be level, in the same plane across all elevations, and at centres that suit your chosen cladding profile.
- Use 25x50mm treated softwood horizontal battens fixed across the vertical counter battens
- Batten centres depend on profile — for shadow gap and shiplap, 400–600mm centres; for loglap, approximately 120mm to match the board overlap
- Check each batten is level with a long spirit level or laser — this is what determines whether your cladding runs are level across the full elevation
- Ensure batten centres are consistent across all four elevations so boards align at corners
- Add extra battens around window and door openings to provide a fixing substrate for reveals and trim
An out-of-level batten framework is the most common cause of cladding that looks wrong on completion — boards that appear to slope across an elevation, joints that don't align at corners, and shadow lines that are visually inconsistent. Spend time getting the battens right. It is very difficult to correct once cladding is on.
Before any board goes on the wall, preparation is essential — particularly for Nordic spruce, which must be treated before installation. For a full guide to species-specific maintenance see our Siberian larch buyers guide.
- Nordic spruce — apply exterior preservative to all faces including the back face and all end grain. The back face is inaccessible once installed; this is the only opportunity to protect it. Allow to dry fully before installation
- Siberian larch — apply end grain sealer to any pre-cut ends. The long faces and edges need no treatment but end grain is the primary moisture entry point
- ThermoWood — apply end grain sealer to pre-cut ends only. No other preparation required
- All species — pre-cut as many boards as possible to finished length before installation. Working at ground level is faster and more accurate than cutting on scaffolding or steps
- Stack boards flat off the ground in the order they will be installed — this reduces handling time significantly during installation
Cladding installation in progress — boards are fixed horizontally working from the base of the wall upward. Each board is fixed to every horizontal batten with A4 stainless steel screws, with the fixing point of each board covered by the board above.
With the batten framework complete and boards prepared, installation proceeds from the base of the wall upward. This is the most satisfying stage — the building transforms quickly once the first few courses are in.
- Start with a starter strip — fix a thin packing piece (same thickness as the board overlap) at the base behind the first board. This sets the correct angle for the entire elevation and prevents the first board sitting flat against the batten
- Fix the first board level across the full elevation — check with a long spirit level or string line. The first board sets the horizontal reference for every subsequent course
- Work upward consistently — fix each board to every horizontal batten. Do not skip fixings to save time
- A4 stainless fixings only — one screw or nail per board per batten. Pre-drill near end grain to prevent splitting, particularly with larch
- Check level every 3–4 courses — minor errors accumulate. Correct small discrepancies across several boards rather than making a sudden step adjustment
- Seal every site cut immediately — apply end grain sealer to every cut end before the next board covers it. Once covered, the end grain cannot be reached again
- Maintain minimum 10mm clearance between board ends and any adjacent structure — abutting boards trap moisture and cause staining and decay at end grain
The quality of the finished result is largely determined by how carefully the corners, window reveals, and base detail are handled. These are the areas buyers and visitors look at first.
External corners
There are two approaches to external corners — mitred boards or a corner post. A mitred corner cuts both meeting boards at 45 degrees so they meet cleanly at the corner arris. This is the more refined result but requires accurate cutting and is less forgiving of any frame that is not perfectly square. A corner post uses a square-section batten fixed at the corner, with the cladding boards butting up to it on each elevation. Simpler to execute and very effective — the corner post can be the same species as the cladding for a coordinated result.
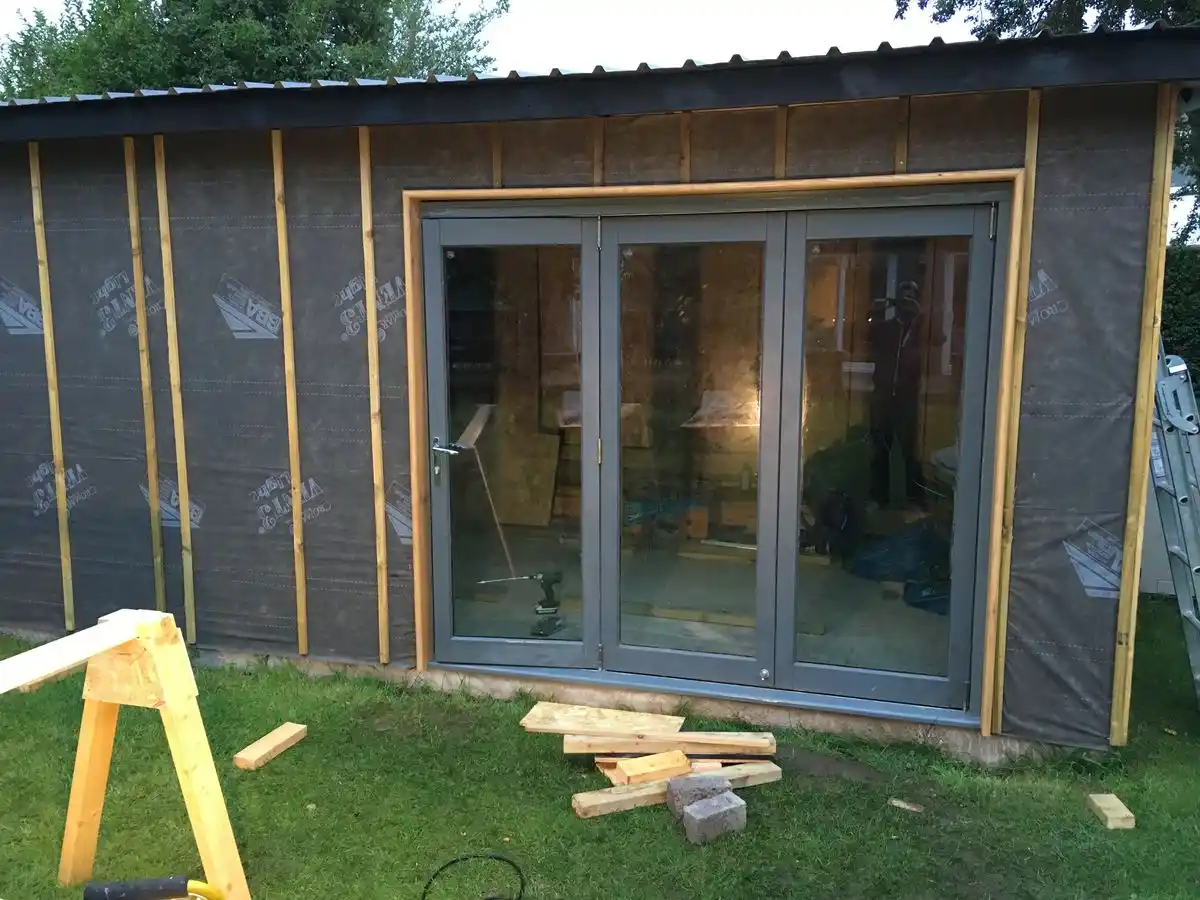
Window and door reveals
At window and door openings, fix a reveal board flush with the frame opening on all four sides before the cladding boards are installed. The cladding boards then butt up to the reveal board cleanly. Seal all end grain at the junction thoroughly — this is where water most commonly tracks into the wall construction if not properly detailed.
Base detail
The base of the cladding must have minimum 150mm clearance above finished ground level. Fit a mesh insect barrier strip at the base of the cavity to prevent insects and small animals entering the ventilated cavity. Do not seal the cavity base with sealant — airflow through the base is essential to the ventilation system performance.
Common Mistakes — And How to Avoid Them
| Mistake | Consequence | How to avoid |
|---|---|---|
| No breather membrane | Moisture accumulates in wall — structural frame rots within 5–10 years | Always fix membrane before battens — no exceptions |
| Galvanised or steel fixings | Rust staining on boards within 1–2 years — particularly bad on larch | A4 stainless steel fixings throughout — every single fixing |
| Boards touching the ground | End grain absorbs ground moisture — boards split and decay within 3–5 years | Minimum 150mm clearance between base board and ground |
| No end grain sealer on site cuts | Moisture entry at cut ends — staining and early deterioration | Seal every cut end immediately before the next board covers it |
| Spruce not pre-treated on back face | Back face decays — impossible to treat once installed | Apply preservative to all faces before installation |
| Battens not level | Cladding appears to slope — very obvious in finished result | Check every batten with spirit level before fixing cladding |
Can I clad a garden room myself?
Yes — cladding a garden room is one of the most accessible self-build tasks. Tools required are basic, materials are straightforward to handle, and the installation sequence is logical. Most self-builders allow 1–2 days for a typical 4x3m garden room. The most important things to get right are the membrane installation, level batten framework, and A4 stainless steel fixings throughout.
What is the best cladding for a garden room?
Siberian larch shadow gap or shiplap is the most popular garden room cladding in the UK — naturally durable without treatment, attractive weathering, contemporary profiles. ThermoWood is the premium zero-maintenance specification. Nordic spruce is the most affordable option with a regular maintenance programme. For a bold black finish, charred timber or factory black-stained larch are the most popular choices.
Do I need a breather membrane behind garden room cladding?
Yes — a breather membrane is essential. It prevents wind-driven rain from penetrating to the structural frame while allowing moisture vapour to escape outward. Without it, moisture accumulates in the wall construction and causes decay to the structural timber frame over time.
How much does it cost to clad a garden room?
Cladding a typical 4x3m garden room costs approximately £700–£1,800 in cladding materials depending on species, plus £150–£250 for membrane, battens and fixings. Total materials approximately £850–£2,050. Add £600–£1,000 for professional installation labour if not self-installing.
How long does it take to clad a garden room?
A typical 4x3m garden room takes 1–2 days to clad for a competent self-builder working alone, or a full day for two people. This includes membrane, battens, and cladding on all four elevations. Professional cladding contractors typically complete a garden room in a single day.
Ready to Order? We'll Calculate Your Exact Quantity
Send us your garden room dimensions, chosen species, and profile and we will calculate the precise material quantity and provide a complete quote — cladding, battens, membrane, and fixings. We supply from UK stock with nationwide delivery in 7–14 days. FSC and PEFC certified.